Plan sprint
In Scrum, a sprint contains selected backlog items pulled by the team that the team is able to finish in a given timebox. There might be different types of requirements assigned to the sprint (user stories, bugs, improvements, technical issues, etc.). The sprint planning meeting is held at the begging of the sprint and it takes typically 2-4 hours. The goal is to understand how work will be done and distributed to the team.
In ScrumDesk, the sprint planning is done in PLAN and WORK view.
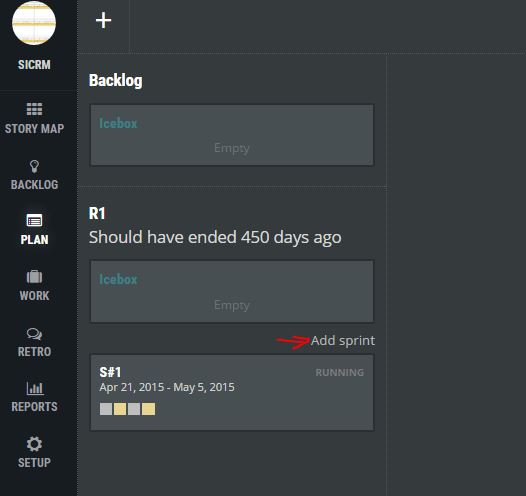
Add a new sprint
New sprint can be added to the selected release in PLAN view.

Every sprint can be described by:
- Name – a title used to reference the sprint.
- Goal – an overview of main achievements that should be accomplished in the sprint. Typically provided by the product owner.
- Start and end date – dates when the sprint will start and ends. These dates are used for metrics calculation and predictions. Dates must be in the future.
Once the new sprint is created, a new box will be displayed in the PLAN view in the iterations panel.
How to add a story to the new sprint
Now, drag this new sprint box into the middle section of PLAN view where will be possible to assign backlog items into the sprint. The content of the sprint will be displayed. Drag either backlog, release, or another sprint into the right panel.
Now you can drag backlog items from either backlog, release, or another sprint into the newly created sprint.
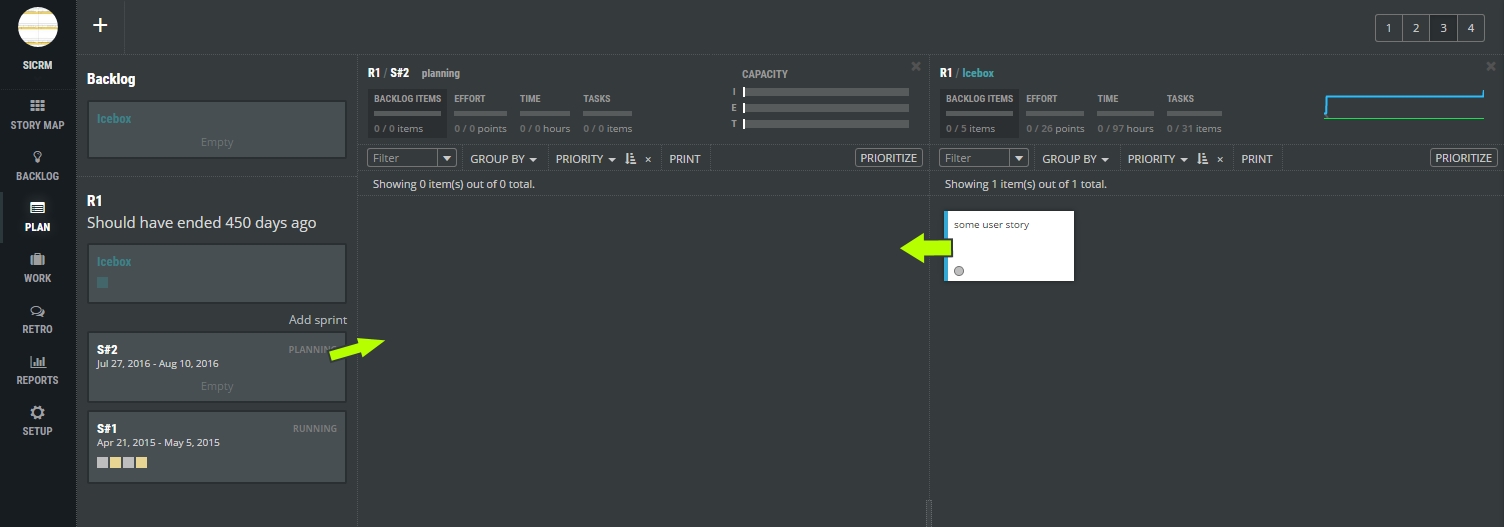
The new story can be directly created in the sprint by double click in the pane displaying sprint content.
Sprint Capacity indicators
ScrumDesk will indicate how much is your sprint filled up compared to your previous velocity.
Progress bars are displayed in the header of the sprint.
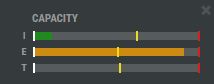
- I – represents how many backlog items are assigned to the sprint compared to previous sprints.
- E – effort, how many story points are assigned to the sprint.
- T – time, how many hours are assigned to the sprint.
Every bar is displayed in three colors:
- Green – the value is safe. It is less than finished in previous sprints.
- Orange – the value is less than 80% finished of previous sprints.
- Red – the value is critical and not safe. The team never achieved such a number in previous sprints.
- The yellow indicator line displayed on every progress bar indicates an average value achieved in previous sprints.
- The red indicator line indicates the maximum value achieved in previous sprints.
As the product owner, assign user stories up to reasonable limits indicated by this sprint capacity indicator so you do not overbook the sprint and help the team focus on the topmost important items.
Break down backlog items into tasks
Now is the best time to start sprint planning with your agile team.
Sprint planning in Scrum is about discussion, understanding, and commitment of the team to deliver the working product.
The techniques for the best agile planning suggest breaking down backlog items into tasks during the sprint planning workshop. The team discusses possible solutions, asks questions, and evidence activities necessary to implement the item as tasks.
ScrumDesk helps the team evidence their tasks in WORK view in form of Kanban board.
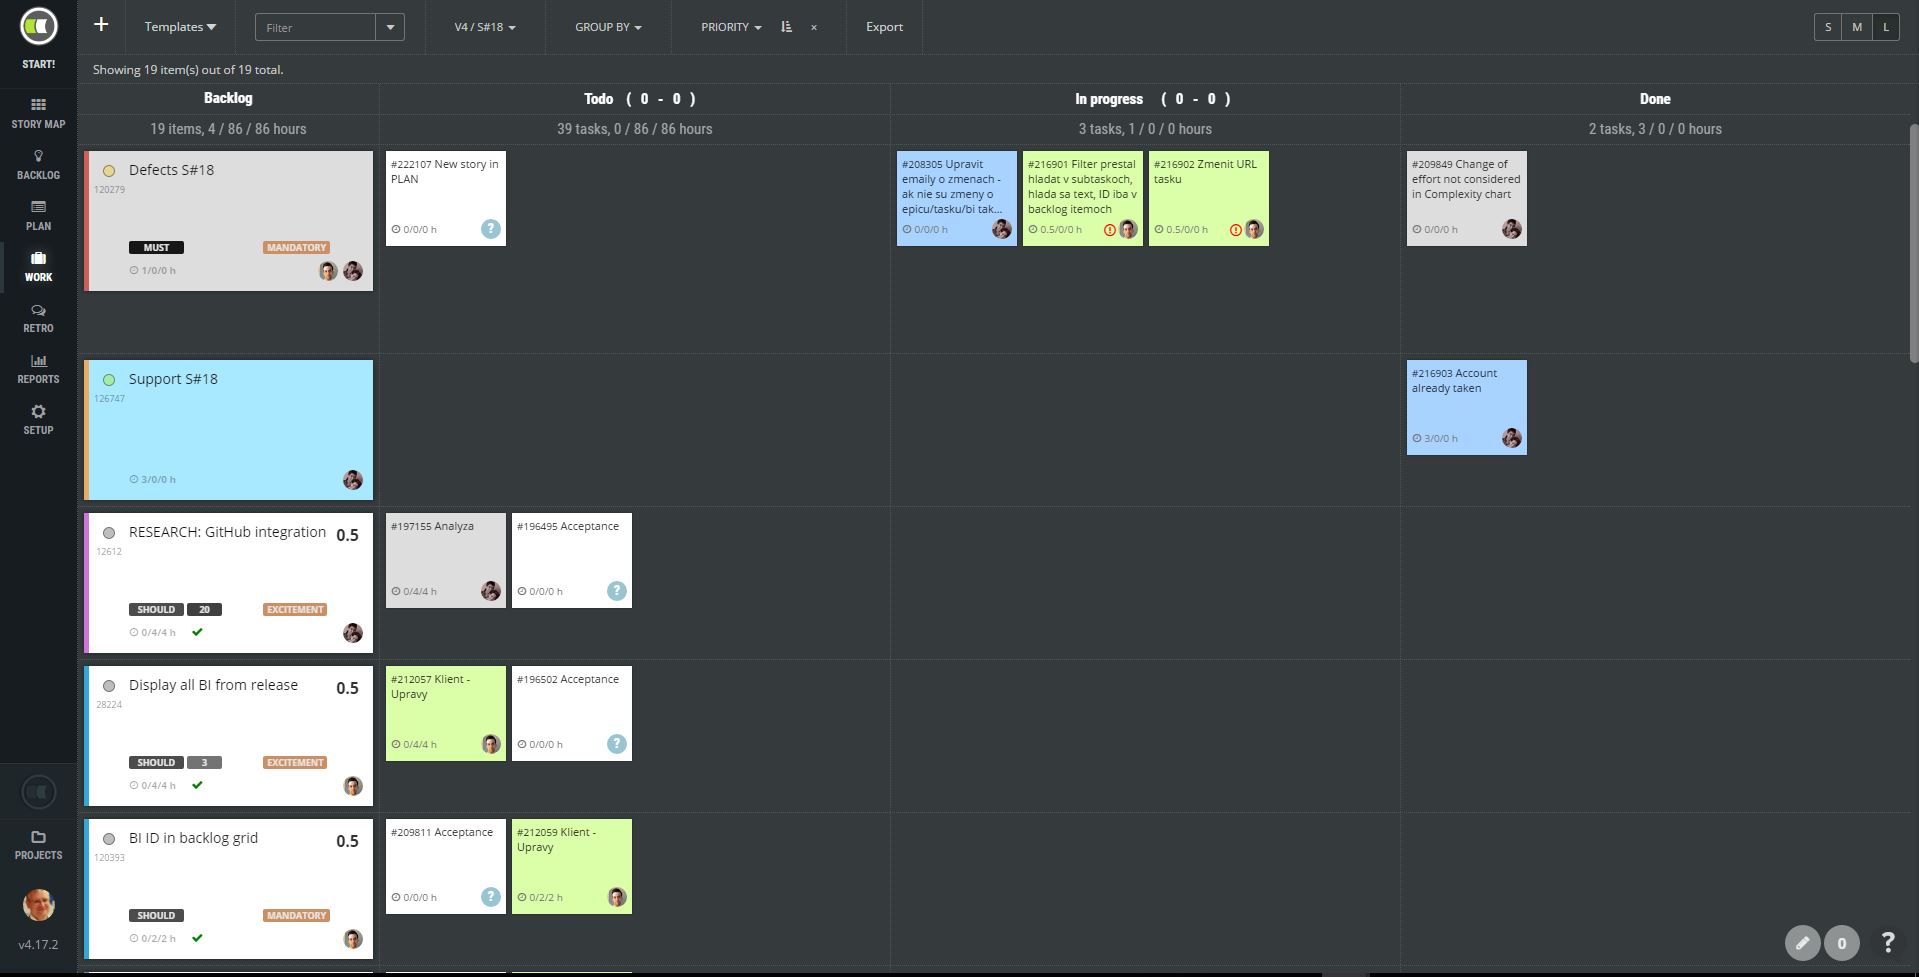
Every backlog item is displayed on a separate row followed by subtasks. At the begging, you will see just ADD TASK option available.
New task
A new task can be added by clicking on ADD TASK option displayed in a row, or in backlog item details displayed in the side view (click backlog item card to access its details).
 Every task can evidence following details:
- Task type – a type of activity, i.e. general task, development, testing, technical, etc. The list is possible to change as necessary.
- #ID – reference number which can be used for further discussion
- Title – task title, an overview of the activity.
- Description – an agreement within the team about the activity.
- Time data – spent, remaining, and estimated time to finish up the activity.
- Waiting flag – used later to track waiting for somebody else.
- Impediment flag – used to evidence blockers.
- Attachments – any file necessary for activity.
- Assigned person – which team member is going to work on the task.
- Color – some teams prefer to use different colors based on the type of activity, or assigned personnel.
We suggest estimating the time and assigning a team member to a card. It is not mandatory, however. Feel free to not assign tasks if you apply that to your agile team.
NOTE: To speed up tasks breakdown and to keep consistency, use Story Templates.
Team Capacity Planner
As tasks are added, estimated, and assigned, ScrumMaster can check how is work leveled across the team with help of a capacity planner and team leveling indicators. To display them, click any empty area of the kanban board to display sprint details.
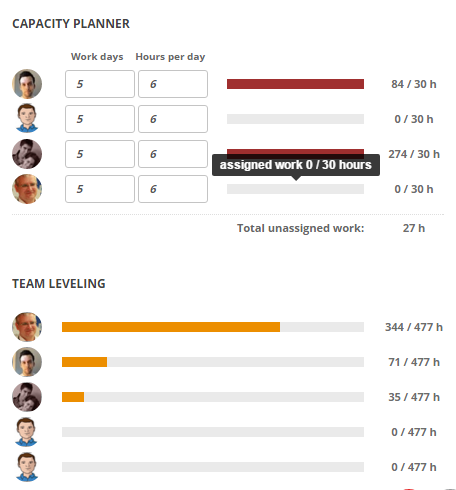
Capacity Planner
- It indicates assigned work compared to the capacity of the team member.
- Workdays – the number of days the team member will work on the project per sprint.
- Hours per day – how many ideal hours is she going to work on the sprint daily.
- Progress bars indicate currently assigned work in the sprint.
- Colors indicate how much is team members overloaded.
Team Leveling
This chart compares how is the capacity of team members leveled across the team.
Team members will be better able to self-organize and distribute tasks within the team without overbooking.
Start the sprint
The last moment is to start the sprint. Click an empty area of the kanban board in WORK view and, in the side view displayed on the right side, change the status of the sprint to RUNNING.
And now run! Burn Down chart has been started and it ticks!